Ancient Wonders: Difference between revisions
| (27 intermediate revisions by 6 users not shown) | |||
| Line 1: | Line 1: | ||
{{Template:Buildings}} | {{Template:Buildings}} | ||
===Ancient Wonders=== | |||
{{Template:AncientWonders_Overview}} | {{Template:AncientWonders_Overview}} | ||
| Line 6: | Line 6: | ||
====Purpose==== | ====Purpose==== | ||
Ancient Wonders are | Ancient Wonders are a heritage from your ancestors. They were great architectural magical structures that served different purposes: some were a source of extra knowledge, others increased the power of training and fighting techniques, others were a source of a high cultural conscience. Some were a symbol and incentive for the union between races, and others were even a channel to enhance the power of the magic relics, increasing production boosts. | ||
Having them in your city will allow you to have all those different bonus and will help you to develop your race even further | Having them in your city will allow you to have all those different bonus', and will help you to develop your race even further, enhancing your city into a higher prosperity level! | ||
Each base race (Humans and Elves) will have the opportunity to build several Ancient Wonders that can be found in the different game chapters. | Each base race (Humans and Elves) will have the opportunity to build several Ancient Wonders that can be found in the different game chapters. | ||
In short, Ancient Wonders will: | In short, Ancient Wonders will: | ||
# Provide additional permanent bonuses for your city | # Provide additional permanent bonuses for your city | ||
# Incentivize you to explore the world map even further | # Incentivize you to explore the world map even further | ||
# Promote | # Promote player interaction | ||
Each Ancient Wonder will provide you with something unique! It can be a portrait you can use in your player profile or a counterpart to embellish your city! | Each Ancient Wonder will provide you with something unique! It can be a portrait you can use in your player profile or a counterpart to embellish your city! | ||
====Requirements==== | |||
To build an Ancient Wonder, you first need to research its corresponding technology and pay its costs. They need a street connection to the Main Hall to be activated. You can only build each Ancient Wonder once, but they can be upgraded, sold and rebuilt! | |||
====Benefits==== | |||
It is difficult to list all the great benefits of Ancient Wonders, but they all have their purpose in your city. Investing in an Ancient Wonder is a long and costly process in terms of resources, but in the end it will be worth it. All of their benefits are dynamic in relation to your city, meaning that as your city evolves and becomes more powerful, so will the Ancient Wonders. | |||
{{AncientWonders_Level_Benefits}} | |||
===Ancient Wonders Menus=== | ===Ancient Wonders Menus=== | ||
To build your Ancient Wonder, you first need to research and activate its corresponding technology. By doing so, you will also unlock the Ancient Wonder Menu, represented by a Rune Circle Icon [[File:Awicons.png|30px]] that will be a part of your Main Menu (just like the Trader, for example). | |||
[[File:UnlockAWMenu2.png|center]] | |||
Hovering your mouse over the Ancient Wonders Icon will show you the amount of Runeshards you have for each Ancient Wonder including the amount of Broken shards. | |||
[[File:AWmouseover2.png|center]] | |||
By clicking on the Ancient Wonders Icon, you will have access to the Ancient Wonders Gallery where you will be able to navigate through all Ancient Wonders: The ones you have researched, built, and the ones still locked. As an overview, you will also be able to see the progress on your activated Runes and the matching Rune Shards to each Ancient Wonder. | |||
[[File:AWwindows2.png|center]] | |||
By hovering your mouse over each Ancient Wonder Thumbnail you will see a tooltip with: | By hovering your mouse over each Ancient Wonder Thumbnail you will see a tooltip with: | ||
*The Ancient Wonder's description | *The Ancient Wonder's description and Level | ||
*The Ancient Wonder's Benefits for your city | |||
*The Ancient Wonder | *Each Benefits Stats | ||
*Each | |||
*The amount of available Rune Shards for the building | *The amount of available Rune Shards for the building | ||
[[File: | [[File:AWdescription2.png|center]] | ||
By opening an Ancient Wonder you will then see its own menu with | By opening an Ancient Wonder you will then see its own menu with four tabs: | ||
'''The Overview''' where you can see: | *'''The Overview''' where you can see: | ||
#The level for the building | #The level for the building | ||
#The Ancient Wonder's Bonus and its | #The Ancient Wonder's Bonus and its stats | ||
#The available Rune Shards | #The available Rune Shards | ||
[[File: | You can also press [[File:Info-icon.png]] for building description. | ||
[[File:AWoverview2.png|center]] | |||
'''The Rune Panel''' where you can: | *'''The Rune Panel''' where you can: | ||
#Insert the Runes Shards (if you have any available) | #Insert the Runes Shards (if you have any available) | ||
#See how many Runes you have activated on the Rune Circle | #See how many Runes you have activated on the Rune Circle | ||
#Collect Broken Shards | #Collect Broken Shards | ||
#Buy the missing Broken Shards to forge one | #Buy the missing Broken Shards to forge one Rune | ||
[[File: | [[File:AWrunepanel.png|center]] | ||
*'''The Build Panel''' that will: | |||
#Show you the requirements and costs for actually upgrading the Ancient Wonder | |||
#Allow you to place the building once you have revealed all 9 Runes | |||
[[File:AWbuildpanel.png|center]] | |||
If you have already built the Ancient Wonder, the Rune Panel will be substituted by a new panel called '''Research'''. | |||
*In '''The Research Panel''' you will see: | |||
#The progress of the research, i.e. the number of spent Knowledge Points for this Ancient Wonder. | |||
#All available options for investing Knowledge Points in the Ancient Wonder (by spending them one by one, spending all available at once, using Ancient Knowledge Instants or Runeshards to invest Knowledge Points. These last ones are only available if you have Ancient Knowledge Instants and/or Runeshards in stock). | |||
#The Help Ranking showing the amount of donated Knowledge Points from any given player and the reward the first number of helpers will get | |||
[[File:AWresearch2.png|center]] | |||
*'''The Levels Panel''' you will see: | |||
# All the benefits provided by the Ancient Wonder at the current level. (In light blue). | |||
# An overview of the benefits provided by the Ancient Wonder in the next level. | |||
[[File: | [[File:AW_lvl_window.png|center]] | ||
{|align="center" cellpadding="1" width="100%" | |||
|style="background-color:#af895f;|'''Hint:''' You can scroll through the menu to see all the benefits per Ancient Wonder level. | |||
|} | |||
===Rune Shards=== | ===Rune Shards=== | ||
| Line 97: | Line 100: | ||
Only by fully activating the Rune Circle with 9 magical Runes will you be able to build an Ancient Wonder. But this process will only be possible if you collect the missing Rune Shards, insert them in the Circle and activate the Runes. | Only by fully activating the Rune Circle with 9 magical Runes, will you be able to build an Ancient Wonder. But this process will only be possible if you collect the missing Rune Shards, insert them in the Circle, and activate the Runes. | ||
That means your first step will be to collect the Rune Shards! | That means your first step will be to collect the Rune Shards! | ||
| Line 129: | Line 132: | ||
===Upgrade Ancient Wonders=== | ===Upgrade Ancient Wonders=== | ||
As explained, building an Ancient Wonder is a 3 step process: Research its technology on the tech tree, activate the 9 runes, and pay the required resources. Once an Ancient Wonder is placed in your city, its benefits are immediately activated for your city in level 1, but you can increase those bonus by upgrading the Ancient Wonder. | |||
<br> | |||
{{Ancient_Wonders_Upgrade}} | |||
[[File:AWupgrade.png|center]] | |||
The Research tab will show you a Knowledge Points progress bar, similar to the ones in the Tech Tree. You will then be able to invest the required Knowledge Points and see the list of players who are helping you to research the upgrade level. | |||
[[File: | [[File:AWresearch2.png|center]] | ||
When the Ancient Wonder's level research is complete, open the Upgrade tab to upgrade it to the next level. | |||
[[File:AWresearchfinish.png|center]] | |||
[[File: | |||
To upgrade any Ancient Wonder to level 6 you will face a new Rune Circle in the Upgrade tab that requires 9 new Runes to be revealed and activated as the architectural magic of your ancestors takes a new turn ! | |||
After this, from level 6 to level 10, the Ancient Wonder will again need Knowledge Points and resources investment. The full process repeats itself in the following Ancient Wonder's levels. | |||
[[File:Newcircle2.png|center]] | |||
{|align="center" cellpadding="1" width="100%" | {|align="center" cellpadding="1" width="100%" | ||
|style="background-color:#af895f;|'''Hint:'''The | |style="background-color:#af895f;|'''Hint:'''By upgrading your Ancient Wonders you will also get Ranking Points! These correspond to the Knowledge Points invested per level. The ranking Points are added only after the building upgrade is completed! | ||
|} | |} | ||
===Invest in Ancient Wonders=== | |||
There are many ways to invest in an Ancient Wonder. You can invest in your own Ancient Wonders or invest in other players' Ancient Wonders and qualify to receive Runeshards and Ancient Knowledge Instants as a reward. If you open the Research tab, you will have an overview on the several ways you can invest and how many Knowledge Points have been invested in that Ancient Wonder. | |||
[[File:AWinvest2.png|center]] | |||
# Indicates the total amount of Knowledge Points already invested. | |||
# By clicking here you will spend 1 Knowledge Point at a time. | |||
# By clicking here you will spend all available Knowledge Points at once. | |||
# By clicking here you will access your Ancient Knowledge Instants inventory in order to use them. | |||
# By clicking here you will use Runeshards from that same Ancient Wonder to invest (note that if you use them on your own Ancient Wonder you will only invest 10 Knowledge Points, if you use them on another player's you will invest 15 Knowledge Points). '''Warning''': For the non-cross-wonder (i.e Crystal Lighthouse for Elven and Great Bell Spire for Humans). You can invest the Rune Shard of your race in a wonder of the other race, the amount of invested knowledge points is the same. | |||
# By clicking here, you can invest by buying Knowledge Points with resources or Diamonds. | |||
# Here you can see who has already invested in this Ancient Wonder and their positions, you can also click on the chests to find out the reward that each positioned player will receive (if you invest in your own Ancient Wonder, you will not receive any reward, even if your investment is higher than any player in the ranking). | |||
Hovering over the Ancient Wonder will give you information on how many Knowledge Points are already invested. | |||
[[File:InvestinAW.png|center]] | |||
| | |||
The top players on the helping rank will be rewarded for their investment and will get Rune Shards and/or Knowledge Points! Remember that even if your Ancient Wonder is built you will still need another set of 9 revealed Runes to upgrade it to other levels, meaning that this is an alternative to gaining them through completing Provinces. | |||
[[File:AWresearchfinish.png|center]] | |||
You can only invest in Ancient Wonders if you have already researched their technology yourself, but once you unlock your first Ancient Wonder technology, you can immediately start to invest in any Ancient Wonder, including the ones you have not unlocked yet. When visiting another city, you can open each Ancient Wonder or click on the Ancient Wonder button at the bottom of your screen: | |||
[[File:AW_Help_button.png|center]] | |||
You can also click on the player's name at various locations in the game to open the Ancient Wonders menu. | |||
This opens a help window where you choose which Ancient Wonder you wish in invest in: | |||
[[File: | [[File:AWhelpgallery.png|center]] | ||
In this window you can immediately identify whether you have invested in these Ancient Wonders before. If you want to follow the Ancient Wonders in which you have already invested, you can open the Contributions menu in the Ancient Wonders gallery and check your position in relation to other players or invest more Knowledge Points in the Ancient Wonders than you already have invested. | |||
[[File:AWcontributions.png|center]] | |||
As said before, Ancient Wonders are a great way to promote players engagement with each other regardless of the chosen race. Humans can invest in Elven Ancient Wonders and vice versa, because they will receive Rune Shards for the Ancient Wonder of their own race that has the same effects as the one they have helped. For example, if you are a Human and want Rune Shards for your Great Bell Spire, you can invest in the Elven Crystal Lighthouse. | As said before, Ancient Wonders are a great way to promote players engagement with each other regardless of the chosen race. Humans can invest in Elven Ancient Wonders and vice versa, because they will receive Rune Shards for the Ancient Wonder of their own race that has the same effects as the one they have helped. For example, if you are a Human and want Rune Shards for your Great Bell Spire, you can invest in the Elven Crystal Lighthouse. | ||
| Line 194: | Line 208: | ||
=== Sell Ancient Wonders=== | === Sell Ancient Wonders=== | ||
Ancient Wonders can be sold, but be very aware that if you decide to do so, your city will lose all its bonus related to that building and will not get any resources back. | Ancient Wonders can be sold, '''but be very aware that if you decide to do so''', your city will lose all its bonus related to that building and will not get any resources back, if you rebuild it you will start again with level 1. | ||
[[File:SelingAW.png|center]] | [[File:SelingAW.png|center]] | ||
| Line 207: | Line 221: | ||
|colspan="1"|Technology | |colspan="1"|Technology | ||
|colspan="1"|Name | |colspan="1"|Name | ||
|colspan="1"|Requirements | |colspan="1"|Upgrade<br>Requirements | ||
|colspan="3"|Benefits | |colspan="3"|Benefits | ||
|colspan="1"| | |colspan="1"|Runes Shards | ||
|- | |- | ||
| Line 215: | Line 229: | ||
|[[File:Aw_c2.png|50px|Secret Ancient Wonders]] | |[[File:Aw_c2.png|50px|Secret Ancient Wonders]] | ||
|[[Secret Ancient Wonders|Tome of Secrets]] | |[[Secret Ancient Wonders|Tome of Secrets]] | ||
| | |{{Knowledge_Points}}{{Spell_Fragment}}{{Combining_Catalyst_small}}{{Royal_Restoration}} | ||
|[[File:Kpicon.png|Knowledge Points every 24H]] | |[[File:Kpicon.png|Knowledge Points every 24H]] | ||
|[[File:Supply_small.png|Supplies per | |[[File:Supply_small.png|Supplies per Main Story quest completed]] | ||
| - | | - | ||
|[[File:B_all_aw1_shards.png|Revealed Runes]] | |[[File:B_all_aw1_shards.png|Revealed Runes]] | ||
| Line 224: | Line 238: | ||
|[[File:Aw_c2.png|50px|Secret Ancient Wonders]] | |[[File:Aw_c2.png|50px|Secret Ancient Wonders]] | ||
|[[Secret Ancient Wonders|Golden Abyss]] | |[[Secret Ancient Wonders|Golden Abyss]] | ||
| | |{{Knowledge_Points}}{{Spell_Fragment}}{{Combining_Catalyst_small}}{{Royal_Restoration}} | ||
|[[File:Coin_small.png|Coins every 3H]] | |[[File:Coin_small.png|Coins every 3H]] | ||
|[[File:Populationadd.png|Additional population]] | |[[File:Populationadd.png|Additional population]] | ||
| Line 233: | Line 247: | ||
|[[File:Aw_c3.png|50px|Ancient Wonders of Tempest]] | |[[File:Aw_c3.png|50px|Ancient Wonders of Tempest]] | ||
|[[Ancient Wonders of Tempest|Endless Excavation]] | |[[Ancient Wonders of Tempest|Endless Excavation]] | ||
| | |{{Knowledge_Points}}{{Spell_Fragment}}{{Combining_Catalyst_small}}{{Royal_Restoration}} | ||
|[[File:Supply_small.png|Supplies every 24H]] | |[[File:Supply_small.png|Supplies every 24H]] | ||
|[[File:Extra_relic.png|Relics | |[[File:Extra_relic.png|Relics per Mystical Object]] | ||
| - | | - | ||
|[[File:B_all_aw3_shards.png|Revealed Runes]] | |[[File:B_all_aw3_shards.png|Revealed Runes]] | ||
| Line 242: | Line 256: | ||
|[[File:Aw_c3.png|50px|Ancient Wonders of Tempest]] | |[[File:Aw_c3.png|50px|Ancient Wonders of Tempest]] | ||
|[[Ancient Wonders of Tempest|Needles of the Tempest]] | |[[Ancient Wonders of Tempest|Needles of the Tempest]] | ||
| | |{{Knowledge_Points}}{{Spell_Fragment}}{{Combining_Catalyst_small}}{{Royal_Restoration}} | ||
|[[File:Damage_boost.png|Increase the strength of light ranged units]] | |[[File:Damage_boost.png|Increase the strength of light ranged units]] | ||
|[[File:Time_small.png|Increase Barracks Training Speed]] | |[[File:Time_small.png|Increase Barracks Training Speed]] | ||
| Line 251: | Line 265: | ||
|[[File:Elf_AW_Ico.png|50px|Elven/Human Ancient Wonders]] | |[[File:Elf_AW_Ico.png|50px|Elven/Human Ancient Wonders]] | ||
|[[Elven_Ancient_Wonders|Martial Monastery]]/[[Human_Ancient_Wonders|Sanctuary]] | |[[Elven_Ancient_Wonders|Martial Monastery]]/[[Human_Ancient_Wonders|Sanctuary]] | ||
| | |{{Knowledge_Points}}{{Spell_Fragment}}{{Combining_Catalyst_small}}{{Royal_Restoration}} | ||
|[[File:Aw_hitpoints.png|Increase Troops Health]] | |[[File:Aw_hitpoints.png|Increase Troops Health]] | ||
|[[File:Culture.png|24px|Additional Culture]] | |[[File:Culture.png|24px|Additional Culture]] | ||
| Line 260: | Line 274: | ||
|[[File:Elf_AW_Ico.png|50px|Elven/Human Ancient Wonders]] | |[[File:Elf_AW_Ico.png|50px|Elven/Human Ancient Wonders]] | ||
|[[Elven_Ancient_Wonders|Crystal Lighthouse]]/[[Human_Ancient_Wonders|Great Bell Spire]] | |[[Elven_Ancient_Wonders|Crystal Lighthouse]]/[[Human_Ancient_Wonders|Great Bell Spire]] | ||
| | |{{Knowledge_Points}}{{Spell_Fragment}}{{Combining_Catalyst_small}}{{Royal_Restoration}} | ||
|[[File:NHreward.png|30px|Goods per NH]] | |[[File:NHreward.png|30px|Goods per NH]] | ||
|[[File:NHlongrime.png|30px|Increase the Polish Effect Duration]] | |[[File:NHlongrime.png|30px|Increase the Polish Effect Duration]] | ||
| Line 269: | Line 283: | ||
|[[File:Aw_c5.png|50px|Forgotten Ancient Wonders]] | |[[File:Aw_c5.png|50px|Forgotten Ancient Wonders]] | ||
|[[Forgotten Ancient Wonders|Watchtower Ruins]] | |[[Forgotten Ancient Wonders|Watchtower Ruins]] | ||
| | |{{Knowledge_Points}}{{Spell_Fragment}}{{Combining_Catalyst_small}}{{Royal_Restoration}} | ||
||[[File:Culture.png|24px|Increase the Building Culture % with NH]] | ||[[File:Culture.png|24px|Increase the Building Culture % with NH]] | ||
||[[File:Culture.png|24px|Additional Culture]] | ||[[File:Culture.png|24px|Additional Culture]] | ||
| Line 278: | Line 292: | ||
|[[File:Aw_c5.png|50px|Forgotten Ancient Wonders]] | |[[File:Aw_c5.png|50px|Forgotten Ancient Wonders]] | ||
|[[Forgotten Ancient Wonders|Thrones of the High Men]] | |[[Forgotten Ancient Wonders|Thrones of the High Men]] | ||
| | |{{Knowledge_Points}}{{Spell_Fragment}}{{Combining_Catalyst_small}}{{Royal_Restoration}} | ||
|[[File:Rankingpoint_big.png|25px|Additional Ranking Points]] | |||
|[[File:Culture.png|24px|Additional Culture]] | |||
| - | | - | ||
|[[File:B_all_aw6_shards.png|Revealed Runes]] | |[[File:B_all_aw6_shards.png|Revealed Runes]] | ||
|- | |- | ||
|[[File: | |[[File:Dwarvesbannerteck.png|60px|A Portal to the Past]] | ||
|[[File:Dwarven_AW_Ico.png|50px|Dwarven Ancient Wonders]] | |[[File:Dwarven_AW_Ico.png|50px|Dwarven Ancient Wonders]] | ||
|[[Dwarven_Ancient_Wonders|Dwarven Bulwark]] | |[[Dwarven_Ancient_Wonders|Dwarven Bulwark]] | ||
| | |{{Knowledge_Points}}{{Spell_Fragment}}{{Combining_Catalyst_small}}{{Royal_Restoration}} | ||
|[[File:Extratroop.png| | |[[File:Extratroop.png|Barracks Light Melee units every 3H]] | ||
|[[File:Add_training_cluster_size.png|Increase | |[[File:Add_training_cluster_size.png|Increase Basic Training Size]] | ||
| - | | - | ||
|[[File:B_dwarfs_aw1_shards.png|Revealed Runes]] | |[[File:B_dwarfs_aw1_shards.png|Revealed Runes]] | ||
|- | |- | ||
|[[File: | |[[File:Dwarvesbannerteck.png|60px|A Portal to the Past]] | ||
|[[File:Dwarven_AW_Ico.png|50px|Dwarven Ancient Wonders]] | |[[File:Dwarven_AW_Ico.png|50px|Dwarven Ancient Wonders]] | ||
|[[Dwarven_Ancient_Wonders|Mountain Halls]] | |[[Dwarven_Ancient_Wonders|Mountain Halls]] | ||
| | |{{Knowledge_Points}}{{Spell_Fragment}}{{Combining_Catalyst_small}}{{Royal_Restoration}} | ||
|[[File:AWGoodboost.png|26px|Increase | |[[File:AWGoodboost.png|26px|Increase the production of Basic Goods in your Basic Goods Manufactories]] | ||
|[[File:Populationadd.png|Additional Population]] | |[[File:Populationadd.png|Additional Population]] | ||
| - | | - | ||
|[[File:B_dwarfs_aw2_shards.png|Revealed Runes]] | |[[File:B_dwarfs_aw2_shards.png|Revealed Runes]] | ||
|- | |- | ||
|[[File:Fairiesbannerteck.png|50px| | |[[File:Fairiesbannerteck.png|50px|Blossoms of Promise]] | ||
|[[File:Fairy_aw.png|50px|Fairies Ancient Wonders]] | |[[File:Fairy_aw.png|50px|Fairies Ancient Wonders]] | ||
|[[Fairies Ancient Wonders|Prosperity Towers]] | |[[Fairies Ancient Wonders|Prosperity Towers]] | ||
| | |{{Knowledge_Points}}{{Spell_Fragment}}{{Combining_Catalyst_small}}{{Royal_Restoration}} | ||
|[[File:Spell_supply_production_boost_1_bonus.png|Increase "Power of Provisions" duration]] | |[[File:Spell_supply_production_boost_1_bonus.png|Increase "Power of Provisions" effect and duration]] | ||
|[[File:Supply_small.png|Additional Supplies every 3H]] | |[[File:Supply_small.png|Additional Supplies every 3H]] | ||
| - | | - | ||
|[[File:B_fairies_aw1_shards.png|Revealed Runes]] | |[[File:B_fairies_aw1_shards.png|Revealed Runes]] | ||
|- | |- | ||
|[[File:Fairiesbannerteck.png|50px| | |[[File:Fairiesbannerteck.png|50px|Blossoms of Promise]] | ||
|[[File:Fairy_aw.png|50px|Fairies Ancient Wonders]] | |[[File:Fairy_aw.png|50px|Fairies Ancient Wonders]] | ||
|[[Fairies Ancient Wonders|Blooming Trader Guild]] | |[[Fairies Ancient Wonders|Blooming Trader Guild]] | ||
| | |{{Knowledge_Points}}{{Spell_Fragment}}{{Combining_Catalyst_small}}{{Royal_Restoration}} | ||
|[[File:Trader_fee_reduced.png|Trader Fee Reduction]] | |[[File:Trader_fee_reduced.png|Trader Fee Reduction]] | ||
|[[File:Trader_small.png|Improve Wholesaler Offer]] | |[[File:Trader_small.png|Improve Wholesaler Offer]] | ||
|[[File:Portal_production.png| Increase Portal | |[[File:Portal_production.png|Increase Portal Prodution Boost]] | ||
|[[File:B_fairies_aw2_shards.png|Revealed Runes]] | |[[File:B_fairies_aw2_shards.png|Revealed Runes]] | ||
|- | |- | ||
|[[File:Orcs%26Goblinsbannerteck.png|50px| | |[[File:Orcs%26Goblinsbannerteck.png|50px|Mud and Mushrooms]] | ||
|[[File:O&G_aw.png|50px|Orcs & Goblins Ancient Wonders]] | |[[File:O&G_aw.png|50px|Orcs & Goblins Ancient Wonders]] | ||
|[[Orcs & Goblins Ancient Wonders|Heroes' Forge]] | |[[Orcs & Goblins Ancient Wonders|Heroes' Forge]] | ||
| | |{{Knowledge_Points}}{{Spell_Fragment}}{{Combining_Catalyst_small}}{{Royal_Restoration}} | ||
|[[File:Orcs.png|24px|Orcs Production per 24h]] | |[[File:Orcs.png|24px|Orcs Production per 24h]] | ||
|[[File:Damage_boost.png|Additional Heavy Melee Damage]] | |[[File:Damage_boost.png|Additional Heavy Melee Damage]] | ||
| Line 329: | Line 343: | ||
|[[File:b_orcs_aw1_shards.png|Revealed Runes]] | |[[File:b_orcs_aw1_shards.png|Revealed Runes]] | ||
|- | |- | ||
|[[File:Orcs%26Goblinsbannerteck.png|50px| | |[[File:Orcs%26Goblinsbannerteck.png|50px|Mud and Mushrooms]] | ||
|[[File:O&G_aw.png|50px|Orcs & Goblins Ancient Wonders]] | |[[File:O&G_aw.png|50px|Orcs & Goblins Ancient Wonders]] | ||
|[[Orcs & Goblins Ancient Wonders|Shrine of the Shrewdy Shrooms]] | |[[Orcs & Goblins Ancient Wonders|Shrine of the Shrewdy Shrooms]] | ||
| | |{{Knowledge_Points}}{{Spell_Fragment}}{{Combining_Catalyst_small}}{{Royal_Restoration}} | ||
|[[File:Extratroop2.png| | |[[File:Extratroop2.png|Barracks Light Ranged Units every 3H]] | ||
|[[File:Add_training_cluster_size.png| | |[[File:Add_training_cluster_size.png|Increase Basic Training Size]] | ||
| - | | - | ||
|[[File:b_orcs_aw2_shards.png|Revealed Runes]] | |[[File:b_orcs_aw2_shards.png|Revealed Runes]] | ||
|- | |- | ||
|[[File:TTFlags.png|50px| | |[[File:TTFlags.png|50px|Natives of the Continent]] | ||
|[[File:WoodElvesaw.png|50px|Woodelves Ancient Wonders]] | |[[File:WoodElvesaw.png|50px|Woodelves Ancient Wonders]] | ||
|[[Woodelves Ancient Wonders|Enar's Embassy]] | |[[Woodelves Ancient Wonders|Enar's Embassy]] | ||
| | |{{Knowledge_Points}}{{Spell_Fragment}}{{Combining_Catalyst_small}}{{Royal_Restoration}} | ||
|[[File:Brokenshard.png|25px|It provides you additional Broken shards every 24 hours]] | |[[File:Brokenshard.png|25px|It provides you additional Broken shards every 24 hours]] | ||
|[[File:Mana.png|25px| | |[[File:Mana.png|25px|Rewards a certain quantity of Mana per Tournament Point]] | ||
| - | | - | ||
|[[File:b_woodelves_aw1_shards.png|30px|Revealed Runes]] | |[[File:b_woodelves_aw1_shards.png|30px|Revealed Runes]] | ||
|- | |- | ||
|[[File:TTFlags.png|50px| | |[[File:TTFlags.png|50px|Natives of the Continent]] | ||
|[[File:WoodElvesaw.png|50px|Woodelves Ancient Wonders]] | |[[File:WoodElvesaw.png|50px|Woodelves Ancient Wonders]] | ||
|[[Woodelves Ancient Wonders|Flying Academy]] | |[[Woodelves Ancient Wonders|Flying Academy]] | ||
| | |{{Knowledge_Points}}{{Spell_Fragment}}{{Combining_Catalyst_small}}{{Royal_Restoration}} | ||
|[[File:Priesthead.png|25px| | |[[File:Priesthead.png|25px|Barracks Mage Units every 3H]][[File:Sorceresshead.png|25px|Barracks Mage Units every 3H]] | ||
|[[File:time_small.png|25px|Increased training speed of the mercenary camp]] | |[[File:time_small.png|25px|Increased training speed of the mercenary camp]] | ||
| - | | - | ||
|[[File:b_woodelves_aw2_shards.png|30px|Revealed Runes]] | |[[File:b_woodelves_aw2_shards.png|30px|Revealed Runes]] | ||
|- | |- | ||
|[[File:SRCbanner.png|50px|Sorcerers | |[[File:SRCbanner.png|50px|The Elvarian Sorcerers Society]] | ||
|[[File:gr5_aw.png|50px|Sorcerers & Dragons Ancient Wonders]] | |[[File:gr5_aw.png|50px|Sorcerers & Dragons Ancient Wonders]] | ||
|[[Sorcerers & Dragons Ancient Wonders|Maze of the Dark Matter]] | |[[Sorcerers & Dragons Ancient Wonders|Maze of the Dark Matter]] | ||
| | |{{Knowledge_Points}}{{Spell_Fragment}}{{Combining_Catalyst_small}}{{Royal_Restoration}} | ||
|[[File:Mana.png|25px|It generates Mana every 3 hours]] | |[[File:Mana.png|25px|It generates Mana every 3 hours]] | ||
|[[File:ManaDecay.png|25px|Reduced Mana decay]] | |[[File:ManaDecay.png|25px|Reduced Mana decay]] | ||
| Line 365: | Line 379: | ||
|[[File:b_gr5_aw1_shards.png|30px|Revealed Runes]] | |[[File:b_gr5_aw1_shards.png|30px|Revealed Runes]] | ||
|- | |- | ||
|[[File:SRCbanner.png|50px|Sorcerers | |[[File:SRCbanner.png|50px|The Elvarian Sorcerers Society]] | ||
|[[File:gr5_aw.png|50px|Sorcerers & Dragons Ancient Wonders]] | |[[File:gr5_aw.png|50px|Sorcerers & Dragons Ancient Wonders]] | ||
|[[Sorcerers & Dragons Ancient Wonders|Dragon Abbey]] | |[[Sorcerers & Dragons Ancient Wonders|Dragon Abbey]] | ||
| | |{{Knowledge_Points}}{{Spell_Fragment}}{{Combining_Catalyst_small}}{{Royal_Restoration}} | ||
|[[File:damage_boost.png|25px| | |[[File:damage_boost.png|25px|Mage Damage Boost]] | ||
|[[File:Mana.png|25px|Mana per | |[[File:Mana.png|25px|Mana per Enchantment usage]] | ||
| - | | - | ||
|[[File:b_gr5_aw2_shards.png|30px|Revealed Runes]] | |[[File:b_gr5_aw2_shards.png|30px|Revealed Runes]] | ||
| Line 377: | Line 391: | ||
|[[File:gr6_aw.png|50px|Halflings Ancient Wonders]] | |[[File:gr6_aw.png|50px|Halflings Ancient Wonders]] | ||
|[[Halflings Ancient Wonders|Temple of the Toads]] | |[[Halflings Ancient Wonders|Temple of the Toads]] | ||
| | |{{Knowledge_Points}}{{Spell_Fragment}}{{Combining_Catalyst_small}}{{Royal_Restoration}} | ||
|[[File:radmortarhead.png|25px| | |[[File:radmortarhead.png|25px|Heavy Ranged Units every 3H]][[File:granitgolemhead.png|25px|Heavy Ranged Units every 3H]] | ||
|[[File:damage_boost.png|25px| | |[[File:damage_boost.png|25px|Heavy Ranged Damage Boost]] | ||
| - | | - | ||
|[[File:Runeshard1.png|30px|Revealed Runes]] | |[[File:Runeshard1.png|30px|Revealed Runes]] | ||
| Line 386: | Line 400: | ||
|[[File:gr6_aw.png|50px|Halflings Ancient Wonders]] | |[[File:gr6_aw.png|50px|Halflings Ancient Wonders]] | ||
|[[Halflings Ancient Wonders|Elvenar Trade Center]] | |[[Halflings Ancient Wonders|Elvenar Trade Center]] | ||
| | |{{Knowledge_Points}}{{Spell_Fragment}}{{Combining_Catalyst_small}}{{Royal_Restoration}} | ||
|[|[[File:Seed_icon.png|25px|Seeds every | |[|[[File:Seed_icon.png|25px|Divine Seeds every 12H]] | ||
|[[File:Spell2boost3.png|25px|Increase "Magical Manufacturing" power]] [[File:Timeboost3.png|25px|Increase "Magical Manufacturing" duration]] | |[[File:Spell2boost3.png|25px|Increase "Magical Manufacturing" power]] [[File:Timeboost3.png|25px|Increase "Magical Manufacturing" duration]] | ||
| - | | - | ||
|[[File:Runeshard2.png|30px|Revealed Runes]] | |[[File:Runeshard2.png|30px|Revealed Runes]] | ||
|- | |||
|[[File:Gr7flag.png|50px|Elementals]] | |||
|[[File:Gr7_aw.png|50px|Elementals Ancient Wonders]] | |||
|[[Elementals Ancient Wonders|Sunset Towers]] | |||
|{{Knowledge_Points}}{{Spell_Fragment}}{{Combining_Catalyst_small}}{{Royal_Restoration}} | |||
|[|[[File:Seed_icon.png|25px|Divine Seeds with every NH chest]] | |||
|[[File:SeedDecay.png|32px|Reduced Divine Seeds Decay]] | |||
| - | |||
|[[File:B_elementals_aw1_shards.png|30px|Revealed Runes]] | |||
|- | |||
|[[File:Gr7flag.png|50px|Elementals]] | |||
|[[File:Gr7_aw.png|50px|Elementals Ancient Wonders]] | |||
|[[Elementals Ancient Wonders|Victory Springs]] | |||
|{{Knowledge_Points}}{{Spell_Fragment}}{{Combining_Catalyst_small}}{{Royal_Restoration}} | |||
|[|[[File:Timeboost3.png|30px|Increased Training Grounds Training Speed]] | |||
|[[File:Damage_boost.png|25px|Light Melee Damage Boost]] | |||
| - | |||
|[[File:B_elementals_aw2_shards.png|30px|Revealed Runes]] | |||
|- | |||
|[[File:Gr8flag.png|50px|Amuni]] | |||
|[[File:Gr8_aw.png|50px|Amuni Ancient Wonders]] | |||
|[[Amuni Ancient Wonders|Pyramid of Purification]] | |||
|{{Knowledge_Points}}{{Spell_Fragment}}{{Combining_Catalyst_small}}{{Royal_Restoration}} | |||
|[|[[File:Gr7_Sent.png|25px|Sentient Goods with every Orc collection]] | |||
|[[File:heavy_melee_small.png|Barracks Heavy Melee Units every 3H]] | |||
| - | |||
|[[File:AW_Runeshard_ch13_1.png|30px|Revealed Runes]] | |||
|- | |||
|[[File:Gr8flag.png|50px|Amuni]] | |||
|[[File:Gr8_aw.png|50px|Amuni Ancient Wonders]] | |||
|[[Amuni Ancient Wonders|Lighthouse of Good Neighborhood]] | |||
|{{Knowledge_Points}}{{Spell_Fragment}}{{Combining_Catalyst_small}}{{Royal_Restoration}} | |||
|[|[[File:Spell_EE_icon.png|Ensorcelled Endowment duration]] | |||
|[[File:Spell_EE_icon.png|Ensorcelled Endowment effect]] | |||
|[[File:CultBuildingsProd_boost.png|Increases Production of discovered resources while under "Ensorcelled Endowment effect" on your Culture buildings]] | |||
|[[File:AW_Runeshard_ch13_2.png|30px|Revealed Runes]] | |||
|- | |||
|[[File:Gr9flag.png|50px|Constructs]] | |||
|[[File:Gr9_aw.png|50px|Constructs Ancient Wonders]] | |||
|[[Constructs Ancient Wonders|D111-a "Timewarp"]] | |||
|{{Knowledge_Points}}{{Spell_Fragment}}{{Combining_Catalyst_small}}{{Royal_Restoration}} | |||
|[[File:sentientBoosted.png|25px|Increase the production of Sentient Goods in your Sentient Goods Manufactories]] | |||
|[[File:tournaments.png|25px|Reduced Tournament cooldown]] | |||
| - | |||
|[[File:AW_Runeshard_ch14_1.png|30px|Revealed Runes]] | |||
|- | |||
|[[File:Gr9flag.png|50px|Constructs]] | |||
|[[File:Gr9_aw.png|50px|Constructs Ancient Wonders]] | |||
|[[Constructs Ancient Wonders|D222-z "Simia Sapiens"]] | |||
|{{Knowledge_Points}}{{Spell_Fragment}}{{Combining_Catalyst_small}}{{Royal_Restoration}} | |||
|[[File:Sentient_decay.png|25px|Reduced Sentient Goods Decay]] | |||
|[[File:Barracks_boosted.png|25px|Increased Troop Units on pickup]] | |||
| - | |||
|[[File:AW_Runeshard_ch14_2.png|30px|Revealed Runes]] | |||
|- | |||
|[[File:Gr10flag.png|50px|Elvenar]] | |||
|[[File:GR10_AW.png|50px|Elvenar Ancient Wonders]] | |||
|[[Elvenar Ancient Wonders|Vortex of Storage]] | |||
|{{Knowledge_Points}}{{Spell_Fragment}}{{Combining_Catalyst_small}}{{Royal_Restoration}} | |||
|[[File:Portal_capacity_boost.png|28px|Portal Storage Capacity Boost]] | |||
|[[File:sentientBoosted.png|30px|Increase the production of Sentient Goods in your Sentient Goods Manufactories]] | |||
| - | |||
|[[File:GR10_AW1_Runeshard.png|30px|Revealed Runes]] | |||
|- | |||
|[[File:Gr10flag.png|50px|Elvenar]] | |||
|[[File:GR10_AW.png|50px|Elvenar Ancient Wonders]] | |||
|[[Elvenar Ancient Wonders|Thermal Spring of Youth]] | |||
|{{Knowledge_Points}}{{Spell_Fragment}}{{Combining_Catalyst_small}}{{Royal_Restoration}} | |||
|[[File:Population_boost.png|33px|Residences Population Boost]] | |||
|[[File:Culture_icon_elves.png|28px|Culture based on your Squad Size]] | |||
| - | |||
|[[File:GR10_AW2_Runeshard.png|30px|Revealed Runes]] | |||
|- | |||
|[[File:Gr11flag.png|50px|Embassies]] | |||
|[[File:GR11_AW.png|50px|Embassies Ancient Wonders]] | |||
|[[Embassies Ancient Wonders|Spire Library]] | |||
|{{Knowledge_Points}}{{Spell_Fragment}}{{Combining_Catalyst_small}}{{Royal_Restoration}} | |||
|[[File:Rankingpoint_big.png|25px|Ranking Points per every Fellowship Spire Crystal you receive]] | |||
|[[File:Kpicon.png|Knowledge Points Production every 24h]] | |||
| - | |||
|[[File:GR11_AW1_Runeshard.png|30px|Revealed Runes]] | |||
|- | |||
|[[File:Gr11flag.png|50px|Embassies]] | |||
|[[File:GR11_AW.png|50px|Embassies Ancient Wonders]] | |||
|[[Embassies Ancient Wonders|Tournament Arena]] | |||
|{{Knowledge_Points}}{{Spell_Fragment}}{{Combining_Catalyst_small}}{{Royal_Restoration}} | |||
|[[File:Rankingpoint_big.png|25px|Ranking Points per every Tournament Chest you receive]] | |||
|[[File:Gr11_AW2_LM.png|25px|Mercenary Camp Light Melee every 3H]] | |||
| - | |||
|[[File:GR11_AW2_Runeshard.png|30px|Revealed Runes]] | |||
|- | |||
|[[File:Gr12flag.png|50px|Traders of Unur]] | |||
|[[File:GR12_AW.png|50px|Traders of Unur Ancient Wonders]] | |||
|[[Traders of Unur Ancient Wonders|Dragon Ark]] | |||
|{{Knowledge_Points}}{{Spell_Fragment}}{{Combining_Catalyst_small}}{{Royal_Restoration}} | |||
|[[File:Sg3up.png|30px|Boosted Precious Sentient Goods per Story Quest]] | |||
|[[File:Combining_Catalyst_1.png|25px|Combining Catalyst per Mystical Object]] | |||
| - | |||
|[[File:GR12_AW1_Runeshard.png|30px|Revealed Runes]] | |||
|- | |||
|[[File:Gr12flag.png|50px|Traders of Unur]] | |||
|[[File:GR12_AW.png|50px|Traders of Unur Ancient Wonders]] | |||
|[[Traders of Unur Ancient Wonders|Oracle of Fortune]] | |||
|{{Knowledge_Points}}{{Spell_Fragment}}{{Combining_Catalyst_small}}{{Royal_Restoration}} | |||
|[[File:SentientBoosted.png|Rewards random Boosted Sentient Goods every time you craft something]] | |||
|[[File:Royal_Restoration.png|25px|Produces Royal Restoration weekly]] | |||
| - | |||
|[[File:GR12_AW2_Runeshard.png|30px|Revealed Runes]] | |||
|- | |||
|[[File:Gr13flag.png|50px|Team Spirit]] | |||
|[[File:GR13_AW.png|50px|Team Spirit Ancient Wonders]] | |||
|[[Team Spirit Ancient Wonders|Shrine of the Champions]] | |||
|{{Knowledge_Points}}{{Spell_Fragment}}{{Combining_Catalyst_small}}{{Royal_Restoration}} | |||
|[[File:Gruff_Orc.png|25px|Training Groungs Heavy Melee Units every 3H]] | |||
|[[File:orcs.png|20px|Orcs per Tournament Point]] | |||
| - | |||
|[[File:GR13_AW1_Runeshard.png|30px|Revealed Runes]] | |||
|- | |||
|[[File:Gr13flag.png|50px|Team Spirit]] | |||
|[[File:GR13_AW.png|50px|Team Spirit Ancient Wonders]] | |||
|[[Team Spirit Ancient Wonders|Temple of Spirits]] | |||
|{{Knowledge_Points}}{{Spell_Fragment}}{{Combining_Catalyst_small}}{{Royal_Restoration}} | |||
|[[File:Unurium.png|25px|Unurium per Spire Chest]] | |||
|[[File:Unurium.png|25px|Unurium per Event Currency Pickup]] | |||
| - | |||
|[[File:GR13_AW2_Runeshard.png|30px|Revealed Runes]] | |||
|- | |||
|[[File:Gr14flag.png|50px|Revenge of the Exile]] | |||
|[[File:GR14_AW.png|50px|Revenge of the Exile Ancient Wonders]] | |||
|[[Revenge of the Exile Ancient Wonders|Vallorian Seal Tower]] | |||
|{{Knowledge_Points}}{{Spell_Fragment}}{{Combining_Catalyst_small}}{{Royal_Restoration}} | |||
|[[File:Unurium.png|25px|Unurium for Coins Pickup from Residences]] | |||
|[[File:Unurium_decay.png|Reduces Unurium decay]] | |||
| - | |||
|[[File:GR14_AW1_Runeshard.png|30px|Revealed Runes]] | |||
|- | |||
|[[File:Gr14flag.png|50px|Revenge of the Exile]] | |||
|[[File:GR14_AW.png|50px|Revenge of the Exile Ancient Wonders]] | |||
|[[Revenge of the Exile Ancient Wonders|Tree of Enlightenment]] | |||
|{{Knowledge_Points}}{{Spell_Fragment}}{{Combining_Catalyst_small}}{{Royal_Restoration}} | |||
|[[File:mc_lr_units.png|Mercenary Camp Light Ranged Units every 3H]] | |||
|[[File:AscendedBoosted.png|Increase the production of Ascended Goods in your Ascended Goods Manufactories]] | |||
| - | |||
|[[File:GR14_AW2_Runeshard.png|30px|Revealed Runes]] | |||
|- | |||
|[[File:Gr15flag.png|50px|The Power of Music]] | |||
|[[File:GR15_AW.png|50px|The Power of Music Ancient Wonders]] | |||
|[[The Power of Music Ancient Wonders|Ancestral Resting Place]] | |||
|{{Knowledge_Points}}{{Spell_Fragment}}{{Combining_Catalyst_small}}{{Royal_Restoration}} | |||
|[[File:Ascendedgoods_decay_reduction.png|25px|Reduces Ascended Goods Decay]] | |||
|[[File:Tg_ma.png|25px|Training Grounds Mage Units every 3h]] | |||
| - | |||
|[[File:GR15_AW1_Runeshard.png|30px|Revealed Runes]] | |||
|- | |||
|[[File:Gr15flag.png|50px|The Power of Music]] | |||
|[[File:GR15_AW.png|50px|The Power of Music Ancient Wonders]] | |||
|[[The Power of Music Ancient Wonders|Scouts' Tavern]] | |||
|{{Knowledge_Points}}{{Spell_Fragment}}{{Combining_Catalyst_small}}{{Royal_Restoration}} | |||
|[[File:Scouting_timer.png|25px|Reduces the Scouting time]] | |||
|[[File:Neighbourly_help_rewards_increase.png|25px|Increases the amount of Neighbourly Help Chests]] | |||
| - | |||
|[[File:GR15_AW2_Runeshard.png|30px|Revealed Runes]] | |||
|- | |||
|[[File:Gr16flag.png|50px|The Vallorian Legend]] | |||
|[[File:GR16_AW.png|50px|The Vallorian Legend Ancient Wonders]] | |||
|[[The Vallorian Legend Ancient Wonders|Maman Le Pré's Antique Shop]] | |||
|{{Knowledge_Points}}{{Spell_Fragment}}{{Combining_Catalyst_small}}{{Royal_Restoration}} | |||
|[[File:Seed_icon.png|25px|Produces an amount of Divine Seeds every 3h]] | |||
|[[File:AscendedBoosted.png|Gives an amount of Boosted Ascended Goods]] per [[File:Work.png|Community Work pick up from Residences]] | |||
| - | |||
|[[file:CH21_AW1_Runeshard.png|30px|Revelead Runes]] | |||
|- | |||
|[[File:Gr16flag.png|50px|The Vallorian Legend]] | |||
|[[File:GR16_AW.png|50px|The Vallorian Legend Ancient Wonders]] | |||
|[[The Vallorian Legend Ancient Wonders|Vallorian School of Sorcery]] | |||
|{{Knowledge_Points}}{{Spell_Fragment}}{{Combining_Catalyst_small}}{{Royal_Restoration}} | |||
|[[File:Mc_hm.png|25px|Produces an amount of Mercenary Camp Heavy Melee Units every 3H]] | |||
|[[File:Cauldron_Ing_Reduction.png|Cauldron Ingredients Cost Reduction]] | |||
|[[File:Time_Reduction.png|Reduces Magic Academy Production Time]] | |||
|[[file:CH21_AW2_Runeshard.png|30px|Revelead Runes]] | |||
|- | |||
|[[File:Ch22_Flag.png|50px|link=Harbours of the Deep]] | |||
|[[File:Ch22_AW.png|50px|link=Harbours of the Deep Ancient Wonders]] | |||
|[[Harbours of the Deep Ancient Wonders|Tournament Fan Curve]] | |||
|{{Knowledge_Points}}{{Spell_Fragment}}{{Combining_Catalyst_small}}{{Royal_Restoration}} | |||
|[[File:Seed_icon.png|25px|Gives a certain amount of Divine Seeds per Tournament Point]] | |||
|[[File:CW_decay_reduction.png|Reduces Community Work Decay]] | |||
| - | |||
|[[file:Ch22_aw1_shards.png|Revelead Runes]] | |||
|- | |||
|[[File:Ch22_Flag.png|50px|link=Harbours of the Deep]] | |||
|[[File:Ch22_AW.png|50px|link=Harbours of the Deep Ancient Wonders]] | |||
|[[Harbours of the Deep Ancient Wonders|Altar of Eternity]] | |||
|{{Knowledge_Points}}{{Spell_Fragment}}{{Combining_Catalyst_small}}{{Royal_Restoration}} | |||
|[[File:Tg_hr.png|25px|Produces an amount of Training Grounds Heavy Ranged Units every 3H]] | |||
|[[File:Seed_icon.png|25px|Divine Seeds|Gives a certain amount of Divine Seeds per Spire Chest]] | |||
| - | |||
|[[file:Ch22_aw2_shards.png|Revelead Runes]] | |||
|- | |- | ||
|} | |} | ||
Latest revision as of 15:22, 21 September 2024
|
Ancient Wonders
| Ancient Wonders List Overview | |||||||
|---|---|---|---|---|---|---|---|

|

|

|

| ||||

|

|

|

| ||||

|

|

|

| ||||

|

|

|

| ||||

|

|

|

| ||||

|

|
||||||
Purpose
Ancient Wonders are a heritage from your ancestors. They were great architectural magical structures that served different purposes: some were a source of extra knowledge, others increased the power of training and fighting techniques, others were a source of a high cultural conscience. Some were a symbol and incentive for the union between races, and others were even a channel to enhance the power of the magic relics, increasing production boosts.
Having them in your city will allow you to have all those different bonus', and will help you to develop your race even further, enhancing your city into a higher prosperity level!
Each base race (Humans and Elves) will have the opportunity to build several Ancient Wonders that can be found in the different game chapters.
In short, Ancient Wonders will:
- Provide additional permanent bonuses for your city
- Incentivize you to explore the world map even further
- Promote player interaction
Each Ancient Wonder will provide you with something unique! It can be a portrait you can use in your player profile or a counterpart to embellish your city!
Requirements
To build an Ancient Wonder, you first need to research its corresponding technology and pay its costs. They need a street connection to the Main Hall to be activated. You can only build each Ancient Wonder once, but they can be upgraded, sold and rebuilt!
Benefits
It is difficult to list all the great benefits of Ancient Wonders, but they all have their purpose in your city. Investing in an Ancient Wonder is a long and costly process in terms of resources, but in the end it will be worth it. All of their benefits are dynamic in relation to your city, meaning that as your city evolves and becomes more powerful, so will the Ancient Wonders.
| Hint: As your Ancient Wonder is evolved, the more powerful the provided benefits will become. You can click on the Levels tab in the Ancient Wonder window to find out how powerful that Ancient Wonder's benefits will be at each level. |
Ancient Wonders Menus
To build your Ancient Wonder, you first need to research and activate its corresponding technology. By doing so, you will also unlock the Ancient Wonder Menu, represented by a Rune Circle Icon ![]() that will be a part of your Main Menu (just like the Trader, for example).
that will be a part of your Main Menu (just like the Trader, for example).
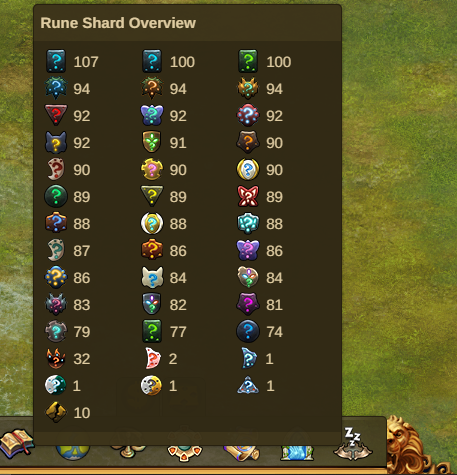
Hovering your mouse over the Ancient Wonders Icon will show you the amount of Runeshards you have for each Ancient Wonder including the amount of Broken shards.
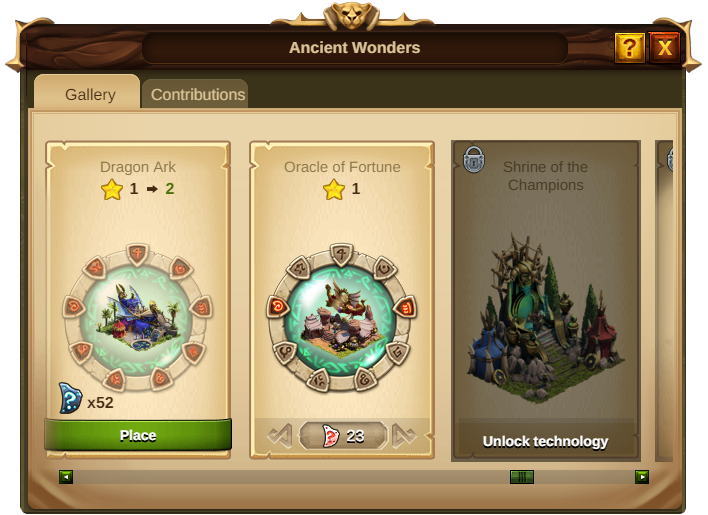
By clicking on the Ancient Wonders Icon, you will have access to the Ancient Wonders Gallery where you will be able to navigate through all Ancient Wonders: The ones you have researched, built, and the ones still locked. As an overview, you will also be able to see the progress on your activated Runes and the matching Rune Shards to each Ancient Wonder.
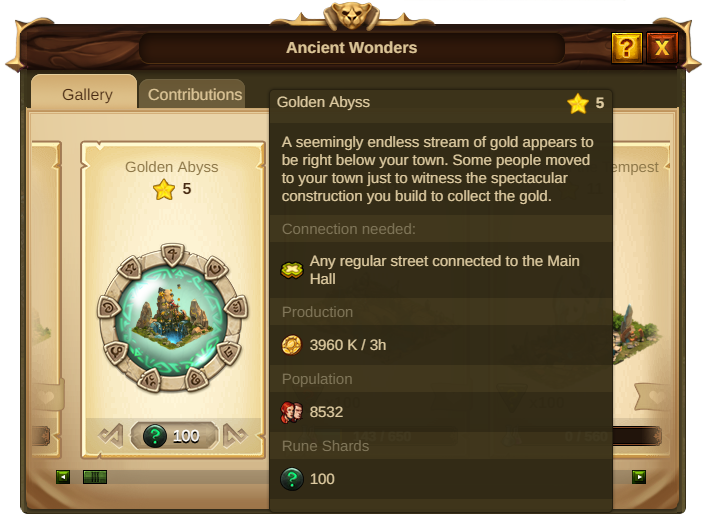
By hovering your mouse over each Ancient Wonder Thumbnail you will see a tooltip with:
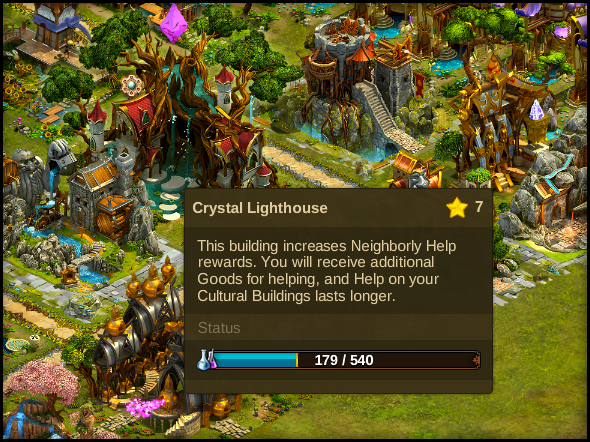
- The Ancient Wonder's description and Level
- The Ancient Wonder's Benefits for your city
- Each Benefits Stats
- The amount of available Rune Shards for the building
By opening an Ancient Wonder you will then see its own menu with four tabs:
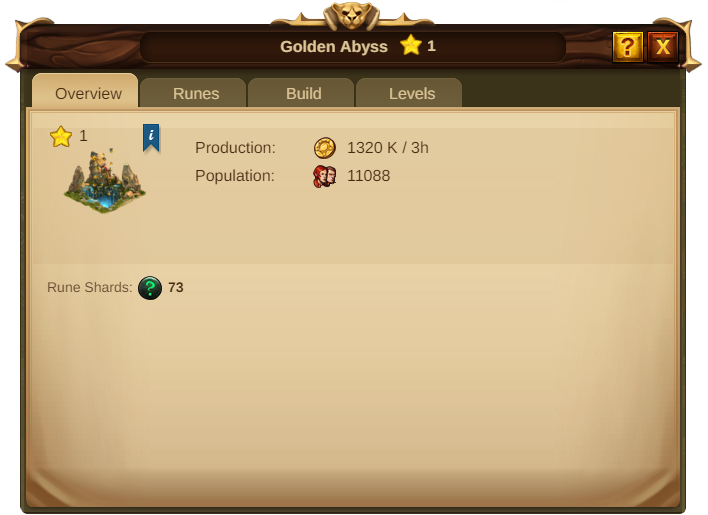
- The Overview where you can see:
- The level for the building
- The Ancient Wonder's Bonus and its stats
- The available Rune Shards
You can also press ![]() for building description.
for building description.
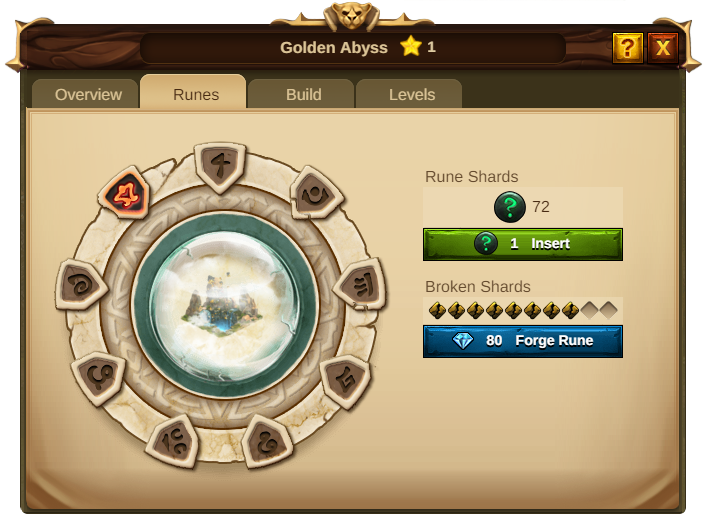
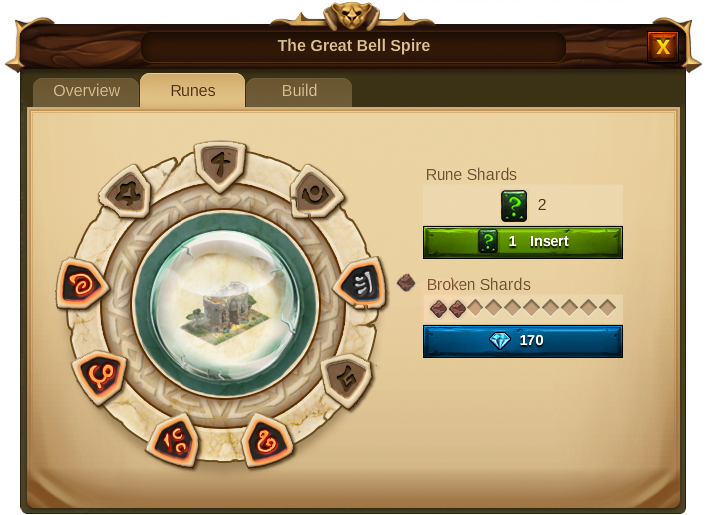
- The Rune Panel where you can:
- Insert the Runes Shards (if you have any available)
- See how many Runes you have activated on the Rune Circle
- Collect Broken Shards
- Buy the missing Broken Shards to forge one Rune
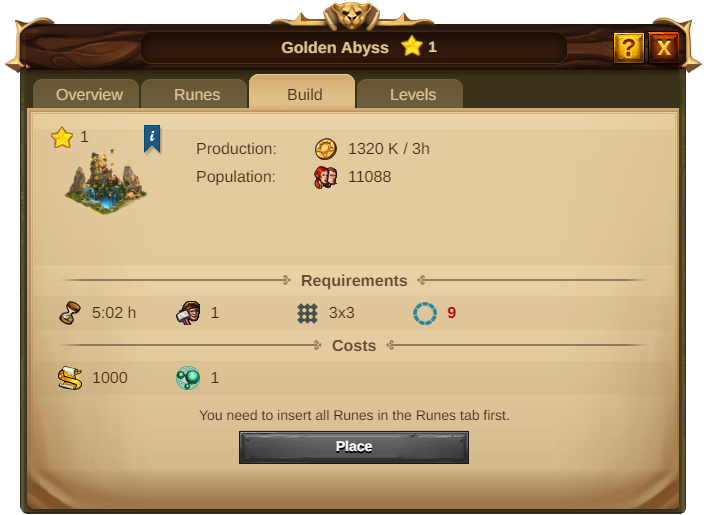
- The Build Panel that will:
- Show you the requirements and costs for actually upgrading the Ancient Wonder
- Allow you to place the building once you have revealed all 9 Runes
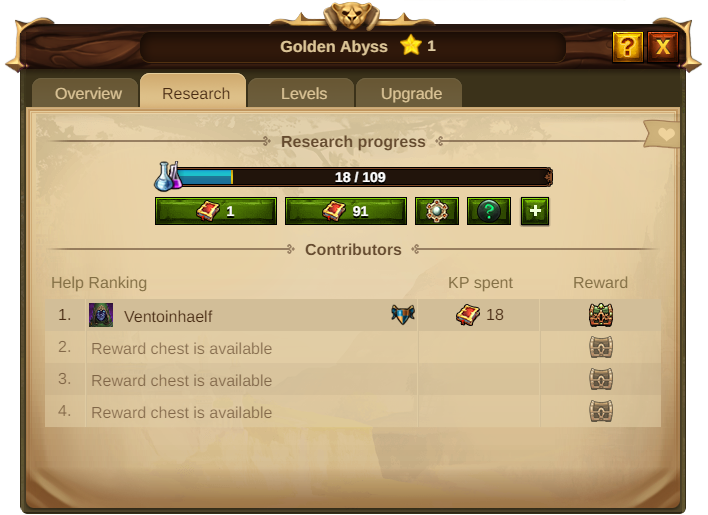
If you have already built the Ancient Wonder, the Rune Panel will be substituted by a new panel called Research.
- In The Research Panel you will see:
- The progress of the research, i.e. the number of spent Knowledge Points for this Ancient Wonder.
- All available options for investing Knowledge Points in the Ancient Wonder (by spending them one by one, spending all available at once, using Ancient Knowledge Instants or Runeshards to invest Knowledge Points. These last ones are only available if you have Ancient Knowledge Instants and/or Runeshards in stock).
- The Help Ranking showing the amount of donated Knowledge Points from any given player and the reward the first number of helpers will get
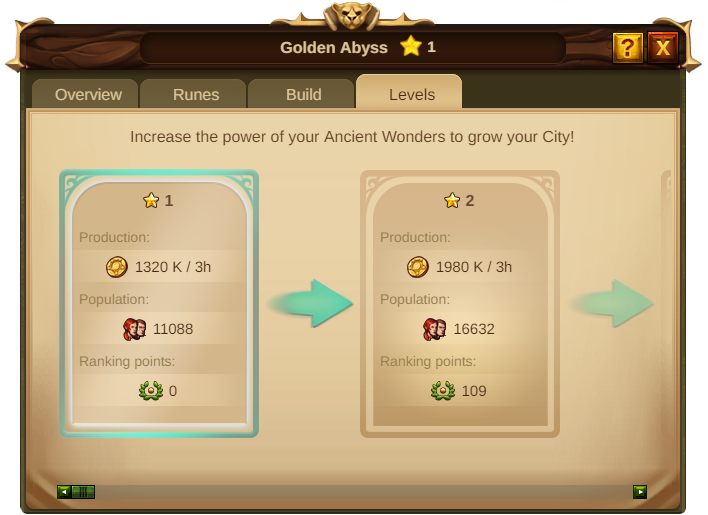
- The Levels Panel you will see:
- All the benefits provided by the Ancient Wonder at the current level. (In light blue).
- An overview of the benefits provided by the Ancient Wonder in the next level.
| Hint: You can scroll through the menu to see all the benefits per Ancient Wonder level. |
Rune Shards
By now, you will know that the Rune Circles you recently discovered are not complete! Their Runes were shattered and are missing some parts... those parts - The Rune Shards - are still lost and you need to find them in order to complete the Circles!
Only by fully activating the Rune Circle with 9 magical Runes, will you be able to build an Ancient Wonder. But this process will only be possible if you collect the missing Rune Shards, insert them in the Circle, and activate the Runes.
That means your first step will be to collect the Rune Shards!
Each Ancient Wonder is attached to a specific Rune Shard. You can see which Rune Shard belongs to each Ancient Wonder on the Overview panel.
You will get Rune Shards:
- By completing Provinces in the World Map - Each completed Province will give you a random Rune Shard for a random Ancient Wonder. It doesn't even have to be already unlocked in the Tech Tree
- By Investing Knowledge Points in other players' Ancient Wonders.
- In the Tournaments
- As rewards for completing Quests
- In special Game events
After collecting a Rune Shard, you need to insert it in the Rune Circle of the relevant Ancient Wonder. With a bit of fortune, it will activate one of the missing Runes within that Circle and reveal it. However, in some cases, the magic process will just try to reveal a Rune which has already been activated and in this case your Shard will break even more.
But not all is lost! Your Broken Shards will be kept and once you have collected 10 of them, you can forge them into a new unrevealed Rune.
| Hint:Broken Shards can be used to reveal all kinds of Runes in any Ancient Wonder! So if you still have them after building one Ancient Wonder you can use them to forge and activate a Rune in a new one! |
Upgrade Ancient Wonders
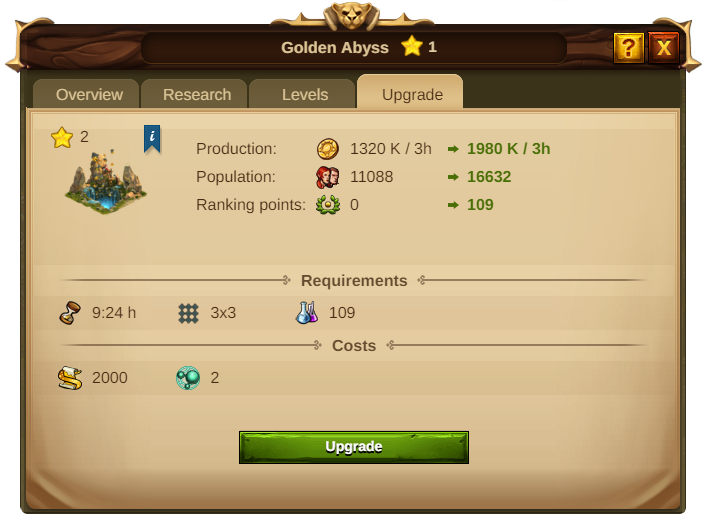
As explained, building an Ancient Wonder is a 3 step process: Research its technology on the tech tree, activate the 9 runes, and pay the required resources. Once an Ancient Wonder is placed in your city, its benefits are immediately activated for your city in level 1, but you can increase those bonus by upgrading the Ancient Wonder.
To upgrade an Ancient Wonder you need the following resources:
 Knowledge Points - These are used to research each level of the Ancient Wonder, each level requires an increasing amount of Knowledge Points, the higher the level the greater the investment required.
 Spell Fragments - These are used to upgrade the majority of the Ancient Wonder's levels, the higher the level the greater the amount required.
 Combining Catalyst - These are also used to upgrade the majority of the Ancient Wonder's levels, the higher the level the greater the amount required.
 Royal Restoration - These are used to upgrade an Ancient Wonder every 5 levels (in the Rune phase), the higher the level, the greater the amount required. They are also required to build all of the Ancient Wonders, with the exception of the first two Ancient Wonders that you can unlock in the game.
| Please Note: Each level of an Ancient Wonder will require Spell Fragments and Combined Catalysts as an upgrade cost. The amount will vary depending on the level to be upgraded, you can check its costs in the Upgrade tab of your Ancient Wonder. Each Rune Level (every 5 levels) will also require a certain amount of Royal Restorations, this amount will again depend on the Ancient Wonder level. |
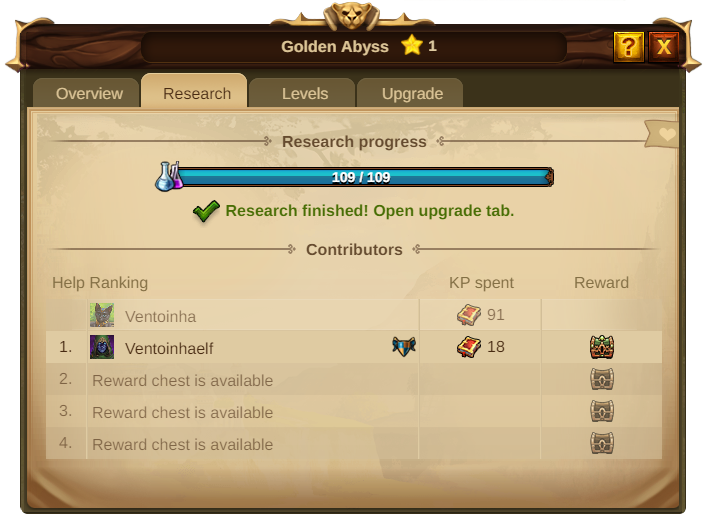
The Research tab will show you a Knowledge Points progress bar, similar to the ones in the Tech Tree. You will then be able to invest the required Knowledge Points and see the list of players who are helping you to research the upgrade level.
When the Ancient Wonder's level research is complete, open the Upgrade tab to upgrade it to the next level.
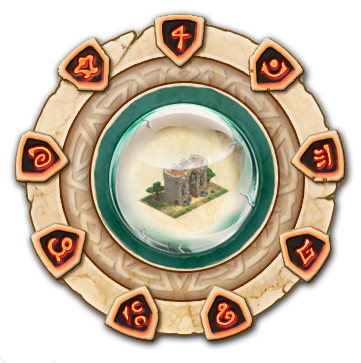
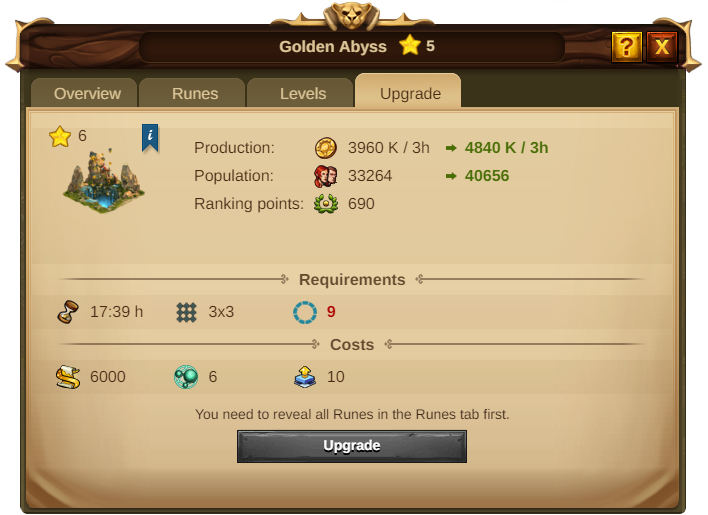
To upgrade any Ancient Wonder to level 6 you will face a new Rune Circle in the Upgrade tab that requires 9 new Runes to be revealed and activated as the architectural magic of your ancestors takes a new turn !
After this, from level 6 to level 10, the Ancient Wonder will again need Knowledge Points and resources investment. The full process repeats itself in the following Ancient Wonder's levels.
| Hint:By upgrading your Ancient Wonders you will also get Ranking Points! These correspond to the Knowledge Points invested per level. The ranking Points are added only after the building upgrade is completed! |
Invest in Ancient Wonders
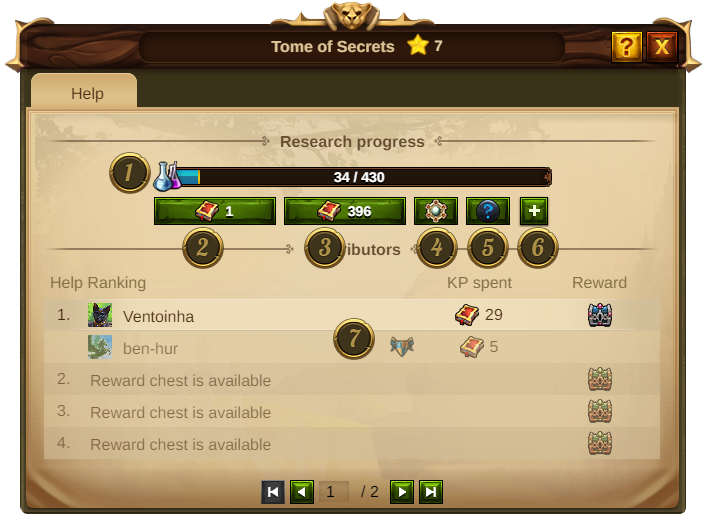
There are many ways to invest in an Ancient Wonder. You can invest in your own Ancient Wonders or invest in other players' Ancient Wonders and qualify to receive Runeshards and Ancient Knowledge Instants as a reward. If you open the Research tab, you will have an overview on the several ways you can invest and how many Knowledge Points have been invested in that Ancient Wonder.
- Indicates the total amount of Knowledge Points already invested.
- By clicking here you will spend 1 Knowledge Point at a time.
- By clicking here you will spend all available Knowledge Points at once.
- By clicking here you will access your Ancient Knowledge Instants inventory in order to use them.
- By clicking here you will use Runeshards from that same Ancient Wonder to invest (note that if you use them on your own Ancient Wonder you will only invest 10 Knowledge Points, if you use them on another player's you will invest 15 Knowledge Points). Warning: For the non-cross-wonder (i.e Crystal Lighthouse for Elven and Great Bell Spire for Humans). You can invest the Rune Shard of your race in a wonder of the other race, the amount of invested knowledge points is the same.
- By clicking here, you can invest by buying Knowledge Points with resources or Diamonds.
- Here you can see who has already invested in this Ancient Wonder and their positions, you can also click on the chests to find out the reward that each positioned player will receive (if you invest in your own Ancient Wonder, you will not receive any reward, even if your investment is higher than any player in the ranking).
Hovering over the Ancient Wonder will give you information on how many Knowledge Points are already invested.
The top players on the helping rank will be rewarded for their investment and will get Rune Shards and/or Knowledge Points! Remember that even if your Ancient Wonder is built you will still need another set of 9 revealed Runes to upgrade it to other levels, meaning that this is an alternative to gaining them through completing Provinces.
You can only invest in Ancient Wonders if you have already researched their technology yourself, but once you unlock your first Ancient Wonder technology, you can immediately start to invest in any Ancient Wonder, including the ones you have not unlocked yet. When visiting another city, you can open each Ancient Wonder or click on the Ancient Wonder button at the bottom of your screen:
You can also click on the player's name at various locations in the game to open the Ancient Wonders menu.
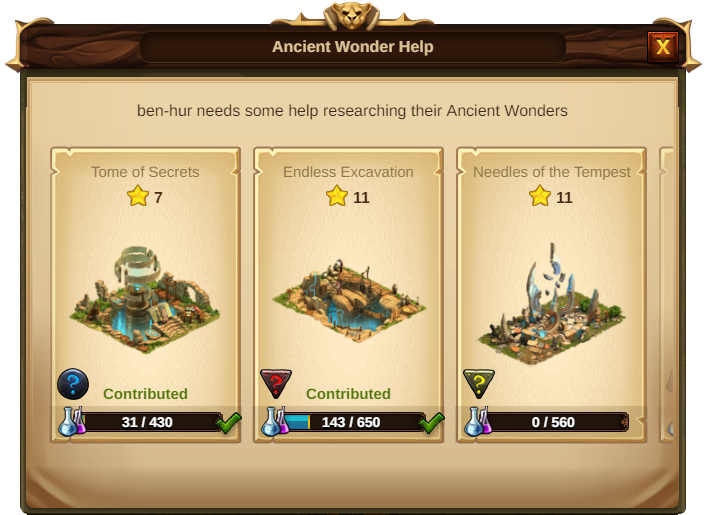
This opens a help window where you choose which Ancient Wonder you wish in invest in:
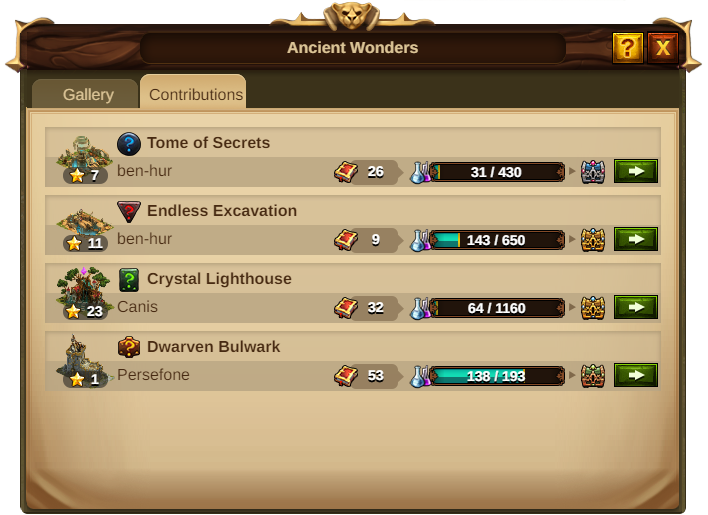
In this window you can immediately identify whether you have invested in these Ancient Wonders before. If you want to follow the Ancient Wonders in which you have already invested, you can open the Contributions menu in the Ancient Wonders gallery and check your position in relation to other players or invest more Knowledge Points in the Ancient Wonders than you already have invested.
As said before, Ancient Wonders are a great way to promote players engagement with each other regardless of the chosen race. Humans can invest in Elven Ancient Wonders and vice versa, because they will receive Rune Shards for the Ancient Wonder of their own race that has the same effects as the one they have helped. For example, if you are a Human and want Rune Shards for your Great Bell Spire, you can invest in the Elven Crystal Lighthouse.
Ancient Wonders Rewards
- Only the top helping players that have helped another Ancient Wonder will be rewarded.
- The amount and content of the rewards depend on the Ancient Wonder level.
- The higher the level of an Ancient Wonder the more places get a reward and bigger the rewards are
- You do not get rewards for investing in your own Ancient Wonders. You will be shown in the Helping Rank but with no reward icon. For example, if the owner is in the first place of the helping ranking, the first reward will be granted for rank position 2 and so on.
Sell Ancient Wonders
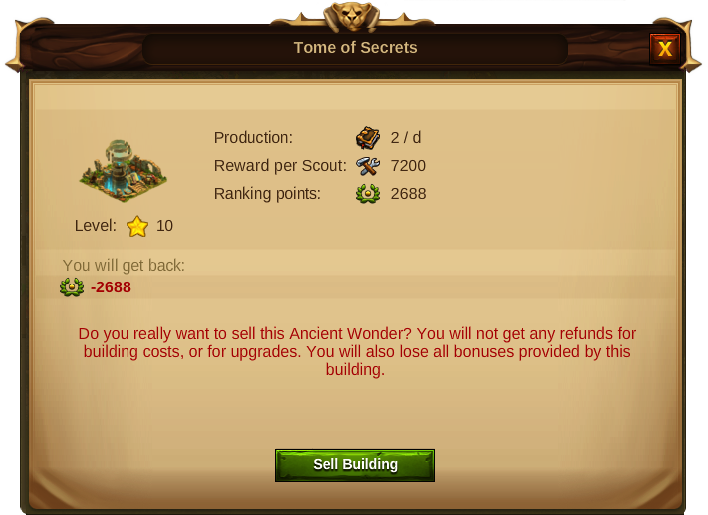
Ancient Wonders can be sold, but be very aware that if you decide to do so, your city will lose all its bonus related to that building and will not get any resources back, if you rebuild it you will start again with level 1.
