Basics: Difference between revisions
| (121 intermediate revisions by 4 users not shown) | |||
| Line 1: | Line 1: | ||
[[Category:Help]] | |||
=== Races=== | |||
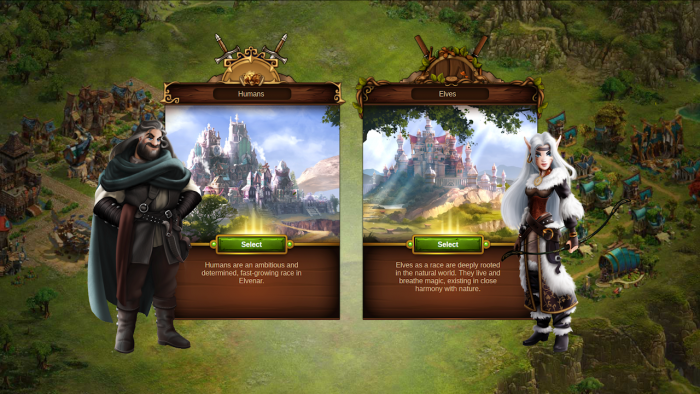
Right after you register an account and log onto the world (game server), you will get to choose if you want to play either as Elves or Humans. | |||
[[File:Race Selection_New.png|700px|center]] | |||
The gameplay of both races will be pretty similar but your choice will influence some main traits: | |||
# The look of your city will depend upon the race you’ve picked. Elves are magical beings, and live in close harmony with nature. Their building design will be very sophisticated. Humans are very ambitious and determined meaning they have a more medieval and industrialized style. | |||
# The military [[Units|units]] that you have at your disposal will also differ. For example, Elves will rely, amongst others, on Treants and Humans on Axe Barbarians. | |||
There can be different worlds (game servers), so you may have the opportunity to try and play both races. | |||
=== City Map === | |||
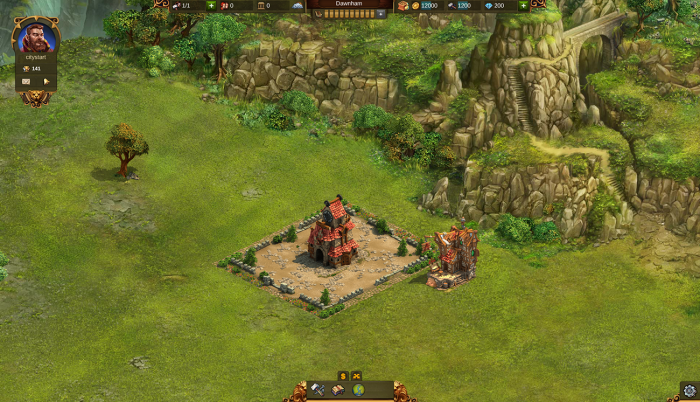
At the beginning, you start with a limited area to build your city. The City Map is an area divided into tiles that looks like a square grid and where you can place your first buildings, in order to start your city's development. You will start with 15x10 tiles. | |||
[[File: | [[File:city_start_human.png|700px|center]] | ||
But of course your goal is to expand and your biggest challenge is to make the best of the space at your disposal. To increase your buildable area you can unlock Expansions in the Research Tree, gain them by solving all Encounters in a Province, or buy a Premium Expansion. Each City Map Expansion has an area of 25 tiles (5x5). | |||
At the beginning, you will already find two buildings on the City Map: The Main Hall and the Builders' Hut. | |||
*The '''[[Main Hall|Main Hall]]''' is the center of your city and acts as your main storage. Most of the buildings need to be connected by streets to the Main Hall to make them functional. | |||
In | *In the '''[[Builders' Hut|Builders' Hut]]''' you will find your Builders. They will help you to construct and upgrade buildings and also to manage your current constructions. | ||
=== Basic Resources === | |||
There are two basic resources in Elvenar, which will help you to grow up your city: | |||
[[File:HUDbasic.png|center|Top bar, showing available basic resources]] | |||
*Coins: Coins are produced automatically over time from [[Residence|'''Residences''']]. | |||
*Supplies: To produce Supplies you need to place an order in the [[Workshop|'''Workshop''']]. Each type of production requires a different length of time. | |||
{|align="center" cellpadding="1" width="100%" | |||
|style="background-color:#af895f;|'''Hint:''' As soon as they are ready, you can collect all your productions at the same time! You just need to click one of the production buildings and drag your mouse through all the others. | |||
|} | |||
=== First steps === | |||
[[File:mentor_elves.png|right|link=]] | |||
At the beginning of the game you should be aware of three things: | |||
First, '''you can’t have a town without inhabitants (population)'''. | |||
When you start building up your town, you should build a couple of Residences first. They ensure you have available population and generate Coins income. Most buildings you will want to build require inhabitants who can work in those buildings, and the construction costs consist mostly of Coins, which your Residences will generate. It is recommended you build at least eight Residences at the beginning. They are cheap and constructed in no time. Just don’t forget to connect them to the Main Hall using streets. | |||
== | |||
Secondly, '''you need to produce Supplies as soon as you have your Residences built.''' | |||
== | They are a very valuable resource used to construct certain buildings, and later also to produce Goods and to train your battle units. Supplies can be produced in Workshops, so it is recommended you build at least three of these as soon as you have a few Residences. With enough Coins and Supplies, your core economy is already in place and running smoothly. | ||
And third, '''you will need [[Culture|Cultural Buildings]] in your town.''' This will allow you to upgrade other buildings and keep your population producing at maximum efficiency. Your city space is limited and always will be. So, upgrading buildings to improve their properties is key to make the most out of the space you have available. To upgrade, you will need many Coins and Supplies as well as inhabitants and [[Culture|Culture]]. Therefore, In order to advance your town, always make sure you have an adequate Culture surplus. | |||
If you have more available [[Culture|Culture]] than required for upgrades, your citizens will be happier and will produce more efficiently. To a certain extent, this will be the cheapest way to earn more Coins and Supplies. Just don’t overdo it! It doesn’t make sense to have a town full of [[Culture|Cultural Buildings]] but no [[Residence|Residences]] to live in. | |||
To make all this easy, just follow the guide who will show you these first stages and how to begin creating your city: | |||
[[File:Begin1.png|center|700px]]<br> | |||
[[File:Guide1.png|center|700px]] | |||
Once your city is growing, it is a good time to go to the [[World Map|'''World Map''']] where you can see your Neighbors, "scout" Provinces, experience "Encounters" and start collecting items such as Relics and Knowledge Points. | |||
[[File:Worldmap1.png|center|500px]] | |||
====First Quests==== | |||
To further your experience of the game and to help you build your city, you will be asked to complete a number of simple Quests: | |||
[[File:Firstquests1.png|center]] | |||
[[File:Firstquestwindow1.png|center|700px]] | |||
Complete all these Quests to gain super starter rewards! | |||
Now that your city is flourishing, it is a good time to go onto the [[World Map|'''World Map''']] where you can scout a few Provinces and start collecting Relics. Relics will become useful very soon. Every time you receive a Relic, you will also receive a “Knowledge Point”. Don’t forget to spend those points regularly in the Research Tree. This will unlock new buildings and other things that will help your city to progress. | |||
And one last bit of advice for beginners: '''Listen to your advisors!''' If you complete quests regularly, you will be generously rewarded, and it will be easy for you to proceed and advance in the game. | |||
Latest revision as of 14:48, 7 May 2020
Races
Right after you register an account and log onto the world (game server), you will get to choose if you want to play either as Elves or Humans.
The gameplay of both races will be pretty similar but your choice will influence some main traits:
- The look of your city will depend upon the race you’ve picked. Elves are magical beings, and live in close harmony with nature. Their building design will be very sophisticated. Humans are very ambitious and determined meaning they have a more medieval and industrialized style.
- The military units that you have at your disposal will also differ. For example, Elves will rely, amongst others, on Treants and Humans on Axe Barbarians.
There can be different worlds (game servers), so you may have the opportunity to try and play both races.
City Map
At the beginning, you start with a limited area to build your city. The City Map is an area divided into tiles that looks like a square grid and where you can place your first buildings, in order to start your city's development. You will start with 15x10 tiles.
But of course your goal is to expand and your biggest challenge is to make the best of the space at your disposal. To increase your buildable area you can unlock Expansions in the Research Tree, gain them by solving all Encounters in a Province, or buy a Premium Expansion. Each City Map Expansion has an area of 25 tiles (5x5).
At the beginning, you will already find two buildings on the City Map: The Main Hall and the Builders' Hut.
- The Main Hall is the center of your city and acts as your main storage. Most of the buildings need to be connected by streets to the Main Hall to make them functional.
- In the Builders' Hut you will find your Builders. They will help you to construct and upgrade buildings and also to manage your current constructions.
Basic Resources
There are two basic resources in Elvenar, which will help you to grow up your city:
- Coins: Coins are produced automatically over time from Residences.
- Supplies: To produce Supplies you need to place an order in the Workshop. Each type of production requires a different length of time.
| Hint: As soon as they are ready, you can collect all your productions at the same time! You just need to click one of the production buildings and drag your mouse through all the others. |
First steps
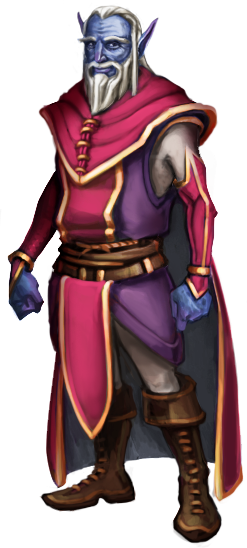
At the beginning of the game you should be aware of three things:
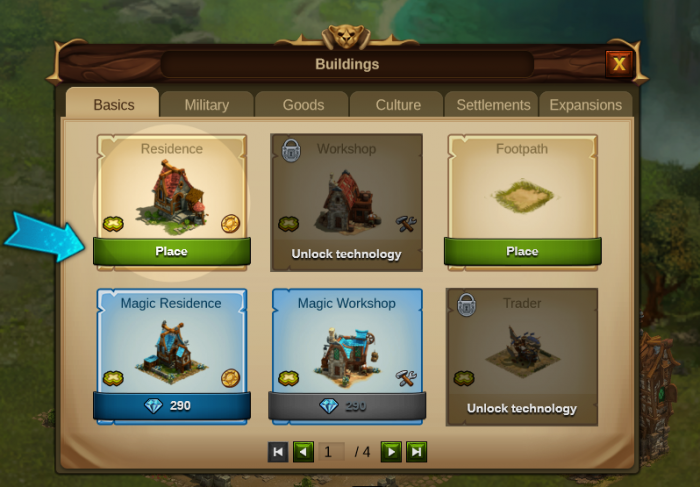
First, you can’t have a town without inhabitants (population). When you start building up your town, you should build a couple of Residences first. They ensure you have available population and generate Coins income. Most buildings you will want to build require inhabitants who can work in those buildings, and the construction costs consist mostly of Coins, which your Residences will generate. It is recommended you build at least eight Residences at the beginning. They are cheap and constructed in no time. Just don’t forget to connect them to the Main Hall using streets.
Secondly, you need to produce Supplies as soon as you have your Residences built. They are a very valuable resource used to construct certain buildings, and later also to produce Goods and to train your battle units. Supplies can be produced in Workshops, so it is recommended you build at least three of these as soon as you have a few Residences. With enough Coins and Supplies, your core economy is already in place and running smoothly.
And third, you will need Cultural Buildings in your town. This will allow you to upgrade other buildings and keep your population producing at maximum efficiency. Your city space is limited and always will be. So, upgrading buildings to improve their properties is key to make the most out of the space you have available. To upgrade, you will need many Coins and Supplies as well as inhabitants and Culture. Therefore, In order to advance your town, always make sure you have an adequate Culture surplus.
If you have more available Culture than required for upgrades, your citizens will be happier and will produce more efficiently. To a certain extent, this will be the cheapest way to earn more Coins and Supplies. Just don’t overdo it! It doesn’t make sense to have a town full of Cultural Buildings but no Residences to live in.
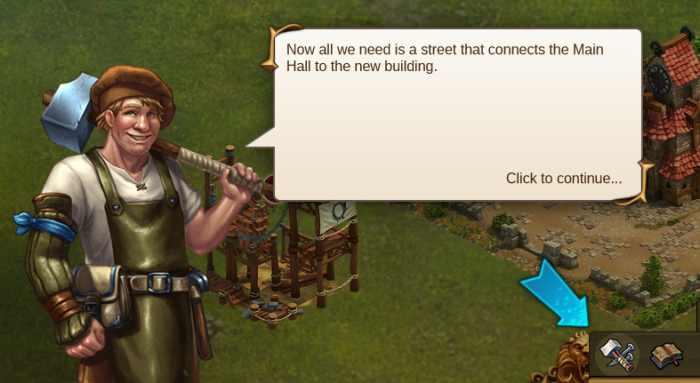
To make all this easy, just follow the guide who will show you these first stages and how to begin creating your city:
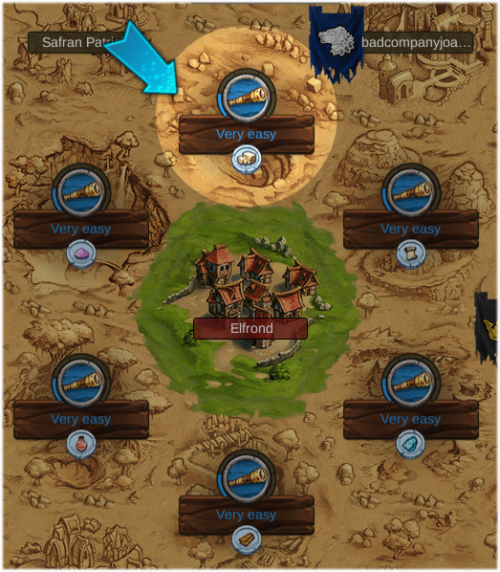
Once your city is growing, it is a good time to go to the World Map where you can see your Neighbors, "scout" Provinces, experience "Encounters" and start collecting items such as Relics and Knowledge Points.
First Quests
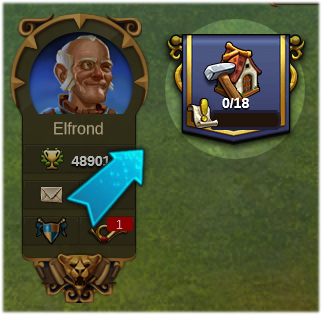
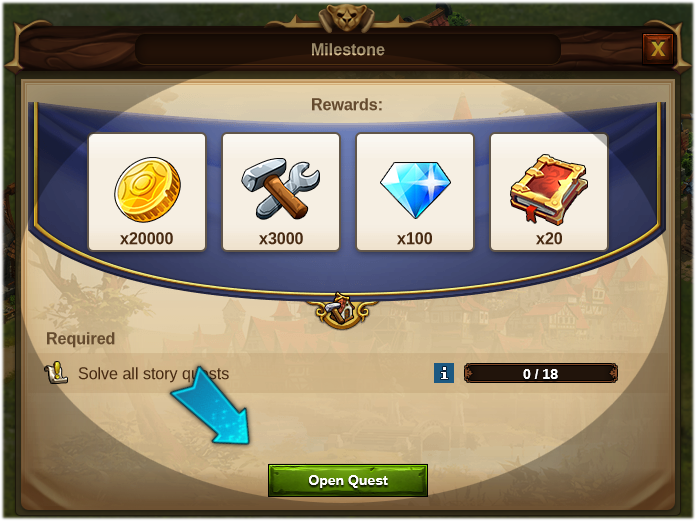
To further your experience of the game and to help you build your city, you will be asked to complete a number of simple Quests:
Complete all these Quests to gain super starter rewards!
Now that your city is flourishing, it is a good time to go onto the World Map where you can scout a few Provinces and start collecting Relics. Relics will become useful very soon. Every time you receive a Relic, you will also receive a “Knowledge Point”. Don’t forget to spend those points regularly in the Research Tree. This will unlock new buildings and other things that will help your city to progress.
And one last bit of advice for beginners: Listen to your advisors! If you complete quests regularly, you will be generously rewarded, and it will be easy for you to proceed and advance in the game.
